Android : How to test if Android Application has memory leaks

Manual Front:
Application slowing down while using it? It gets unresponsive after a while of use? It gets a significant amount of time to load an activity?

Automation Front:
Instrumentation/Robotium test fails after a number of test methods getting executed? Automation fails on its way throwing Out Of Memory exception?

Yes , Symptoms indicate you to investigate on memory leaks with your application.

Lets understand – What is memory leak?:
When declared variables have references to some objects those have occupied memory from heap area, but those object references are no longer used or not to be used with the application anymore, at the same time it prevents GC(Garbage Collector) to release memory – We call it memory leak.

Consequences:
Application occupies memory gradually without freeing them up and when the maximum heap available is occupied , we get Out Of Memory exception – Which says user that application is unresponsive.

How to Check if application has memory leak:

What do we need?
Eclipse with ADT(Android Development Tool) installed.

Steps:

1. Open the application with an Emulator

2. In Eclipse switch to DDMS perspective.

3. From the left panel select the emulator and then select the activity of the application

memoryLeak

4. Click on Update Heap button

5. Now Cause GC button will be Enabled – Click on it.

memoryLeak1

6. Use the application and do the stuffs which makes the application to get unresponsive, observe the “Allocated” column in DDMS.

ml2

If Allocated memory keeps on increasing – This is an indication of memory leak. You can see that when application gets unresponsive , allocated memory will be little less or equals to the maximum heap allocated to the emulator while creating it.

Analyze your application objects to narrow down which portion has the issue:

1. Click on ‘Dump HPROF file’ in the left horizontal menu and save the file .
2. Use MAT Eclipse plug in to investigate/analyze the objects and its occupancy of memory.
MAT Link: click here

Investigate memory leaks while running Instrumentation/Robotium tests:
Now we will see how we can monitor the memory usage of the application at various instances of time and states.

In android instrumentation tests/Robotium tests add the following snippet to get memory(heap) allocated to application- How much getting used and how much is free and the maximum heap memory of the device.

Log.d(“memoryTest”,” : occupied memory ++++++++++ “+Runtime.getRuntime().totalMemory());
Log.d(“memoryTest”,” : Free memory ++++++++++ “+Runtime.getRuntime().freeMemory());

Get the maximum heap that can be occupied in the current device:

Log.d(“memoryTest”,” : can be occupied memory ++++”+Runtime.getRuntime().maxMemory());

To see the Logs – LogCat can be used and by analyzing the logs at various states of the application , we can be assured about the memory leak status.


Android Automation : How to inspect WebViews and get locators

There are several ways to inspect and build locators of native components in  android application – That can be used with a number of android automation tools . e.g Robotium , Appium etc.  UIAutomatorviewer, Hierarchyviewer to name a few.

When question comes about WebViews , we have a limited number of options. So here a Step by step procedure to get locators/inspect web elements in an android application, using Google Chrome browser on PC.

1. Open an Emulator having android version 4.3+

2. Install the application to the Emulator and open the WebView that we want to inspect.
WebView
Please Note: The activity having WebView must be the front most one.

3. Open Google Chrome(30+) in PC and navigate to “chrome://inspect”.
WebViewChrome
4. Check “Discover USB devices”.

5. Wait a while ! Now you can see the WebView page getting listed under the device/Emulator name along with an inspect button.
WebViewChrome
6. Click on the inspect button and you will get the complete HTML code base of the particular WebView which is on the screen of the Emulator.

7. Build your Xpath etc according to the HTML code, on mousehovering tags you can see the respective elements getting highlighted in the application itself.

both

Android | Robotium: Get Android Version and Device Details Programmatically

robotium

While working with Android we might face some situations where we have to write device specific code. e.g Some code goes if running on Emulator and Some other code goes if running on Real device.

This is very much useful while working with Test automation framework : Robotium

While developing test scripts to specify some code which is intended to be executed in Emulator or Real device specifically, or to reflect the details in test reports etc these functions are useful.

Procedure to get Android Version of the device along with Device type(Emulator/Real Device)

 Check if device is Emulator or Real device
Boolean deviceType = “google_sdk”.equals(android.os.Build.PRODUCT);
So our stuffs may go like this:

if(deviceType)
{
//Do this that intended for Emulator
}
else
{
//Do this that intended for Real Device
}
 
android.os.Build.VERSION.RELEASE :  Returns Android Version number as a string. e.g 4.1.1
android.os.Build.VERSION.SDK_INT:   Returns Android SDK version number as a string e.g 16
“google_sdk”.equals(android.os.Build.PRODUCT): returns Boolean value as true if device is Emulator and vice-versa
android.os.Build.MANUFACTURER: returns a String containing the Manufacturer name.
android.os.Build.MODEL:  Returns the model number of the device as String.
 

Appium : Getting started with Appium

appium_logo_rgb

Appium Tool is basically used for automation testing of mobile applications that is not limited to only web applications or native applications , it has support for hybrid app also. It has support for android,iOS as well as for the latest addition to mobile OS Firefox.

Requirements Analysis :

For Android:

  •  Mac OSX 10.7+ or Windows 7+ or Linux.
  • Android SDK >= 16

For iOS:

  • Mac OSX 10.7+ (Recommended 10.8+)
  • Xcode 4.5+ with Command Line Tools

appium1

Getting Started:

  1. Download android SDK and set necessary environment variables.
  2. Download Appium according to OS from here.
    Start the server by running appium and figure out the IP on which the server has been started.
    Or
    Alternatively Appium server can also be started using Node.js for earlier versions of Appium , that is also available to download.Install Node.js, Run reset.bat  in the directory ‘Appium\node_modules\appium’ from cmd and then run ‘node  server.js’ . It will start the server and note down the IP.
  3. Pick up your favorite Java IDE to start with the project . Lets assume we are using Eclipse.
  4. Writing Code:

For Android:

Example:

public class TestScript {
public static WebDriver driver;
 public static Runtime rt = Runtime.getRuntime();
 public static Process proc;
@Before
 public void setUp() throws Exception {

 File classpathRoot = new File(System.getProperty("user.dir"));
 File appDir = new File(classpathRoot, "\\app");
 File app = new File(appDir, "installer file e.ginstaller.apk");
 DesiredCapabilities capabilities = new DesiredCapabilities();
 //capabilities.setCapability("device","devicename/emulator_name");
 capabilities.setCapability("device","appiumtest");
 //capabilities.setCapability("device","selendroid");
 capabilities.setCapability(CapabilityType.BROWSER_NAME, "");
 capabilities.setCapability(CapabilityType.VERSION, "4.3");
 capabilities.setCapability(CapabilityType.PLATFORM, "WINDOWS");
 capabilities.setCapability("app", app.getAbsolutePath());
 capabilities.setCapability("app-package", "com.package.name");
 capabilities.setCapability("app-activity", ".screen_name");
 driver = new SwipeableWebDriver(new URL("http://0.0.0.0:4723/wd/hub"), capabilities);-------> Mention the IP on which server started here.
 // Implicitly wait for 30 seconds for application to open
 //driver.manage().timeouts().implicitlyWait(30, TimeUnit.SECONDS);

 }
@After
 public void tearDown() throws Exception {
 driver.quit();
 }
@Test
 public void apiDemo() throws InterruptedException{

 /* Login process */
 /*
 // Input login
 WebElement enterLogin = driver.findElements(By.tagName("textfield")).get(0); 
 enterLogin.clear();
 enterLogin.clear();
 enterLogin.sendKeys("abcd");
}
@SuppressWarnings("deprecation")
 public class SwipeableWebDriver extends RemoteWebDriver implements HasTouchScreen {
 private RemoteTouchScreen touch;
public SwipeableWebDriver(URL remoteAddress, Capabilities desiredCapabilities) {
 super(remoteAddress, desiredCapabilities);
 touch = new RemoteTouchScreen(getExecuteMethod());
 }
public TouchScreen getTouch() {
 return touch;
 }
 }

For iOS:

Example:

public class class_name {

 private WebDriver driver;

 @Before
 public void setUp() throws Exception {

 //Appium needs the path of app build
 //Set up the desired capabilities and pass the iOS SDK version and app path to Appium
 File app = new File("/Users/user_name/Desktop/../build/Release-iphonesimulator/appname.app");
 DesiredCapabilities capabilities = new DesiredCapabilities();
 capabilities.setCapability(CapabilityType.BROWSER_NAME, "iOS");
 capabilities.setCapability(CapabilityType.VERSION, "6.1");
 capabilities.setCapability(CapabilityType.PLATFORM, "Mac");
 capabilities.setCapability("app", app.getAbsolutePath());

 //Create an instance of RemoteWebDriver and connect to the Appium server.
 //Appium will launch the App in iPhone Simulator using the configurations specified in Desired Capabilities
 driver = new RemoteWebDriver(new URL("http://0.0.0.0:4723/wd/hub"), capabilities);
 }

 @Test
 public void testapplication() throws Exception {

 //iOS controls are accessed through WebElement class
 //Locate the Height & Weight textField by their accessibility labels using By.name()
 WebElement heightTextField = driver.findElement(By.name("Height"));
 heightTextField.sendKeys("181");

 WebElement weightTextField = driver.findElement(By.name("Weight"));
 heightTextField.sendKeys("80");

 //Locate and tap on Calculate button using the click() method
 WebElement calculateButton = driver.findElement(By.name("Calculate"));
 calculateButton.click();

 //Locate all the label elements using By.tagName()
 List<WebElement> labels = driver.findElements(By.tagName("staticText"));

 //Check the calculated Bmi and Category displayed on labels
 //Label with index 8 has value of the Bmi and index 9 has the value for category
 assertEquals("24.42",labels.get(8).getText());
 assertEquals("Normal",labels.get(9).getText());
 }

 @After
 public void tearDown() throws Exception {
 //Close the app and simulator
 driver.quit();
 }
}

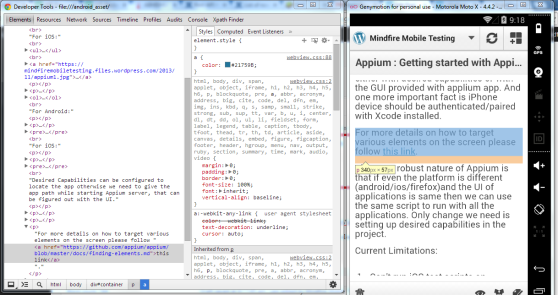
Desired Capabilities can be configured to locate the app otherwise we need to give the app path while starting Appium server, that can be figured out with the UI.

For iOS applications if we want to run test scripts with iOS Simulator then we need the .app build of the xcode project that can be found inside the ios simulator application.

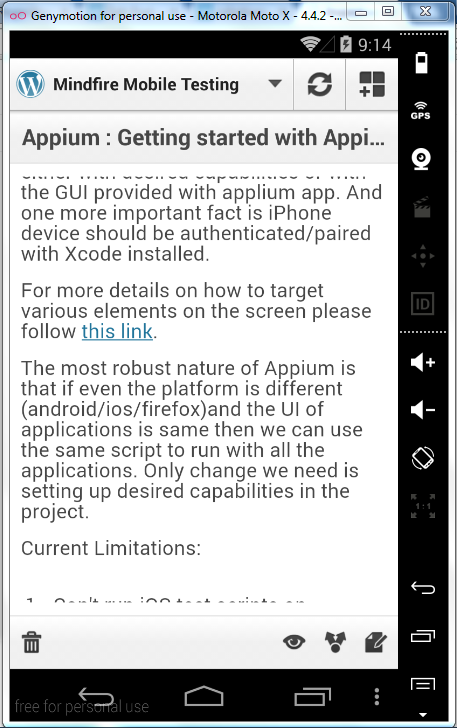
If its a real iPhone then we have to mention Bundle id and package details either with desired capabilities or with the GUI provided with applium app. And one more important fact is iPhone device should be authenticated/paired with Xcode installed.

For more details on how to target various elements on the screen please follow this link.

The most robust nature of Appium is that if even the platform is different (android/ios/firefox)and the UI of applications is same then we can use the same script to run with all the applications. Only change we need is setting up desired capabilities in the project.

Current Limitations:

  1. Can’t run iOS test scripts on Windows or any other platforms except Mac.
  2. Can’t use older versions of Windows or Mac.

Robotium : Run test scripts on a remote device.


android


We have posted about running test scripts directly from Jenkins by introducing use of  android-maven-plugin here. Now we must be able to run test scripts on a VM or Cloud VM using Jenkins on Emulators. But sometimes we need to run scripts on a real device connected to PC , that seems not to be feasible with Cloud VMs or with a device connected to a  remote machine. This can be possible by using some stuffs like USB Redirector. A number of such tools available over internet.

Usb Redirector: http://www.incentivespro.com/usb-redirector.html

This tool must be installed with both machines . The machine to which device is connected will share the device and the other one will connect to it using the host computer’s IP address .

This way we can also make this thing feasible with Cloud VMs also.

Using maven-android-plugin to build android apps by maven commands.


android


We have the option to build jar files from a Java IDE project by running ‘mvn clean install’ etc, but the build type of android projects is apk which is problematic to generate with maven commands from cmd. So to over come this problem we have a plugin available that can be declared in the pom.xml file of the android project which facilitates to compile and build the apk version of the project.

maven-android-plugin homepage: https://code.google.com/p/maven-android-plugin/

Configuring maven-android-plugin in pom.xml of android project:

configure a plugin in pom file like below:

<plugin>
<groupId>com.jayway.maven.plugins.android.generation2</groupId>
<artifactId>android-maven-plugin</artifactId>
<version>3.8.0</version>
<configuration>
<!– <androidManifestFile>${project.basedir}/AndroidManifest.xml</androidManifestFile>
<assetsDirectory>${project.basedir}/assets</assetsDirectory>
<resourceDirectory>${project.basedir}/res</resourceDirectory>
<nativeLibrariesDirectory>${project.basedir}/src/main/native</nativeLibrariesDirectory> –>
<sdk>
<platform>16</platform>
<path>c:\android\sdk</path>
</sdk>
<!– <emulator>
<avd>demodevice</avd>
<wait>100000</wait>
<options>-no-skin</options>
</emulator>
<zipalign>
<verbose>true</verbose>
</zipalign>
<undeployBeforeDeploy>true</undeployBeforeDeploy> –>
</configuration>
<extensions>true</extensions>
</plugin>


Also we need to add an dependency for android core library files which is needed while build process.

<dependency>
<groupId>com.google.android</groupId>
<artifactId>android</artifactId>
<version>4.1.2</version>
<scope>provided</scope>
</dependency>

Note: Currently this plugin is only compatible with Maven version >=3.1.1 . So this version must be installed and environmental setup should be taken care of.

If we are running things on Jenkins then path of android SDK along with path to Maven 3.1.1 must be configured with Jenkins .

Running command “mvn clean install” will compile the code , build the apk .

If project is an android test project, “mvn clean install” command will build the test apk file , install it to all the devices/Emulators connected to android debug bridge and Run the tests on the devices/Emulators. Running it with Jenkins will also generate test run reports in Jenkins.

So this plugin is powerful for users who are using Robotium for android test projects and want to run scripts directly from Jenkins.

Robotium : Run Test Scripts Directly From Mobile Device , Way To Run Shell scripts On Mobile Device

robotium


People using Robotium to automate android application testing must be running scripts on an Emulator or On a device using Eclipse or ADT.
But some scenarios demand to be able to run scripts on the device independently where purpose may be Convenience or some issues regarding the use of the AUT.

Steps:

1. Install the AUT (Application under test) using adb command.
Connect the Mobile using data cable and install necessary drivers.
Check if device is connected or not by using command “adb devices”,This will display all the devices connected.

Now to install AUT use adb install command.
e.g  adb install application_name.apk
Ensure application installation is a success.

 2. Generate the test project apk file.

Compile the Robotium/ Android Test Project using Eclipse , so that it can generate the APK file of the Test project. Install the apk of the test project to the device in the same way AUT is installed.

3.  Install Script Manager App :

To get shell access and to be able to run shell scripts on the Android Device , We need to install Any of the Script Manager or Shell Emulator Apps available on Google Play.

I went for Script Manager(SManager) as it comes with some useful widgets. Click Here to navigate to  the Google Play page of the application I have mentioned.

4. Create Shell scripts for android having .sh extensions the usual way we do for Linux.

Inside that file Just put the shell scripts

e.g am instrument -w -e reportDir sdcard com.hellodemo.test.test.test/com.zutubi.android.junitreport.JUnitReportTestRunner 

Now store that .sh file in Mobile Device (SDCARD/INTERNAL MEMORY).

5. Run the tests from mobile itself.

Now open the application SManager in the android device and navigate to the directory you have stored the .sh or script files. Click on that .sh file and from the options available there click on Run.

Now the test scripts must be running .

Separate .sh files can be used to run scripts those are restricted to run some specific annotated test cases.

6. Creating Shortcuts using Smanager widgets to run scripts on one touch.

Smanager comes with widgets that can be found from widgets area of android and we can add widgets to home screen by specifying which .sh file to execute, which is a convenience.

Please Note: Test script can also be run from Developer Tools from the Instrumentation option , But we it will run the whole Test Script where we desired to run some of them only by specifying annotations.

Robotium : Some Useful functionalities and Methods To Make Automation Scripts More Robust

robotium

1. Targeting Tabs In The Application

Example Case Study:

Suppose We have three tabs in a Screen/Activity in the application. named Tab1 , Tab2 , And Tab3.

And we want to navigate to Tab2 or Tab3 as by default the application launches Tab1. In this case we can manage by writing scripts like
solo.clickOnText(“Tab2”); But in reality It may click on the text ‘Tab2’ which is a part of the context of body of Tab1. So to make sure that only the link navigating to ‘Tab2’ is clicked we have to write scripts in the folowing way:

ViewGroup tabs = (ViewGroup)solo.getView(android.R.id.tabs);
View tab=tabs.getChildAt(1); //change 1 to the desired index.
solo.clickOnView(tab);

2. Targeting Hardware Menu Button and Hardware Back Button

MENU:

             solo.sendKey(Solo.MENU);

BACK:

              solo.sendKey(KeyEvent.KEYCODE_BACK);

3.Get Number of tabs In the current screen:

ViewGroup tabs = (ViewGroup)solo.getView(android.R.id.tabs); //Change tabs in id.tabs to the target id.
int tabcount=tabs.getChildCount();

4. Set Timeout Of various waitFor methods to your desired duration:

Timeout class facilitates to set and get Timeout details of various functions which has a default timeout duration.

e.g Timeout.setLargeTimeout(assert….//or any funtion );
       Timeout.setSmallTimeout(assert….//or any funtion );

       Timeout.getLargeTimeout(assert….//or any funtion );

      Timeout.getSmallTimeout(assert….//or any funtion );

5. Check If a button is in Enabled or Disabled State:

solo.getButton(“Clear History”).isEnabled();

Returns true if enabled otherwise false.

Robotium Integration with Jenkins

robotium logo-title


Robotium Android Testing Platform can be integrated with Jenkins which makes Mobile Automation a step forward .

Step By Step Instructions For Integration with Jenkins:

Step 1:

Deploy Jenkins in server.

Download Jenkins from the website : http://jenkins-ci.org/
Download the war build of Jenkins and deploy it in the server to make start with Jenkins.
If we are using Apache Tomcat then just paste the Jenkins.war file in /webapps directory of Tomcat home location. After this just go to /bin and click on the bat file “startup.bat” , This will start deploying Jenkins.war in the server and after getting server started successfully if deployed in  local machine then navigate to localhost:8080/Jenkins on your Browser .

Step 2:

Install Necessary Plug ins:

On the Dashboard of Jenkins click on ‘Manage Jenkins’ from the left side navigation menu.  Then click on ‘manage plugins’.
From the tabs click on ‘Available’ and search for ‘Android Emulator Plugin’ and install it. As Robotium test project is solely based on Android libraries and we need an android emulator to run the test scripts of Robotium so ‘Android Emulator Plugin’ is necessary.

If we are going to add projects from SVN repository then “Subversion” plugin needs to be installed.

Another plugin called “Green Balls” can be installed so that it will replace the default blue ball indicator for successful builds.
Step 3:

Add a new job from Jenkins Dashboard.

Go back to Jenkins Dashboard and click on ‘New Job’ from the left navigation menu items. It navigates to a page asking to choose project type and give a name to the job.

Give a name of the job in the ‘Job name’ field and choose ‘build a maven2/3 project’ as we have already converted our project to Maven project and plugin for maven support comes as a part of installation of Jenkins, If not so then install maven plugin also.

Click on ‘Ok’

As we are going to add our maven project from SVN, so in the next page under ‘source code management’ select subversion and provide the Repository URL. There are some other options  in that page to choose , fill them up according to the necessity.

Click on ‘Apply’ and ‘Save’. Every time we need to change the configuration click on ‘configure’ link in the left navigation page.

Step 4:

Provide Pre steps and Post steps.

Pre steps will be executed before the build starts and post steps will be executed after the build, But any failure in pre steps and post steps will show Build as failure.

We have to give windows batch commands to run the test scripts on the device or emulator.
From ‘Add post build steps’ drop down select ‘Execute Windows batch Command’ and add the command that we usually use to run the test scripts from the command prompt.

e.g ”

adb -d shell am instrument -w -e reportDir sdcard com.hellodemo.test.test.test/com.zutubi.android.junitreport.JUnitReportTestRunner”

Step 5:

If we need to pull any file from device or emulator e.g Reports , we can specify another windows batch command to pull those files to the specified location in the command.

e.g  “adb -d pull sdcard/junit-report.xml D:\android_java\Xml2Html\report”

Note: Please ensure the APK file of your test scripts has already been installed with the device or emulator, otherwise you need to install it using adb install command or the same can be provided in the pre build steps in the Jenkins configuration of your project.

Android Robotium : Make Wi-Fi and Mobile Data Network Enable & Disable Programatically

android

While working with android application development or automating test scripts for android application testing sometimes we need to ON/OFF Wi-Fi and Mobile Data Access feature explicitly.

Android library facilitates to do that in the following way:

For Wi-Fi:

WifiManager wifiman=(WifiManager)solo.getCurrentActivity().getSystemService(Context.WIFI_SERVICE);
wifiman.setWifiEnabled(false);

Passing false will disable Wi-Fi and true enables it.

For Mobile Data:

ConnectivityManager dataManager=(ConnectivityManager)solo.getCurrentActivity().getSystemService(Context.CONNECTIVITY_SERVICE);

Method dataMtd = ConnectivityManager.class.getDeclaredMethod(“setMobileDataEnabled”, boolean.class);
dataMtd.setAccessible(true);
dataMtd.invoke(dataManager, true);

Please Note:

The following permission must be configured in AndroidManifest.xml file .
For Wi-Fi:

android.permission.ACCESS_WIFI_STATE

android.permission.CHANGE_WIFI_STATE

For Mobile Data:

android.permission.CHANGE_NETWORK_STATE